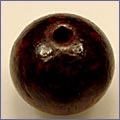
Wood Beads
In this section:
History of Wooden Beads
Wood is generally easy to find and work with so wherever wood is found you will find wooden beads. Regional carpenters and carvers use the most readily available species of wood and beadmaking itself was used as exercises for apprentices or as spare time work for journeymen or masters. This wide variety of woodworkers and woods makes for an astonishing variety of forms, sizes, and types of wood beads.
Unfortunately, because these wooden beads are so common they are taken for granted. The amount of printed material on the subject of wood beads is few and far between and the study of common wood beads is not considered a proper subject for serious bead researchers. Much of the background for this article was found on the World Wide Web as advertising banners. Other sources on the Web treat wood beads as adjunct to information on prayer beads or abacus, because they incorporate wooden beads into the finished product.
Types of Wood Use
Most exotic wood beads originate in the Middle East or southern Asia,but Europe is also a source of wood beads. The Czech Republic producesinexpensive pine and bass wood beads for children's toys and macramécrafters, as well as inexpensive wood beads you'd find in bead shopsworldwide.
As with all forms of beads there are a few dedicated artists here in America and elsewhere who revel in making their own wooden beads. These artists collect exotic woods from around the world and carve exquisite and unique types.
Making Wooden Beads
The original method is somewhat more involved. It starts by gathering twigs, which can be done as part of fall pruning. Most fruit trees will work well for beads and their wood is fragrant (modern manufacturers generally use fir or bass wood). To make your own beads you will need pruning shears, a pen knife, a small craft drill or pin drill, a file, paint or stain and acrylic sealant.
After you prune your tree, choose twigs that are less than half an inch in diameter, peel the bark off the twigs and if the bark sticks scrape it away with the pen knife. Once the bark is off, use the pruning shears to cut the twigs to the approximate size beads you want or perhaps a little larger. This will give you an idea of how the finished beads will look.
The next step is to drill out the pulpy center of the twig. Use the smallest drill bit you have and in this case the smaller the better. Hold the bead steady and start drilling out the core slowly and carefully. This should not be done with power tools, do it by hand. It is a tedious, slow process and unless you're careful the bead will be ruined.
Now the wood has to dry thoroughly, which is another tedious step. Set the beads in a dry open space for three to seven days depending on how much moisture the wood holds. Once they are dried out they are ready to shape. Now that the wood is dry, file off the sharp edges and use the file to create the final shape. It's probably best to go with round or oval for your first batch and as you become more accustomed to shaping the wood you can create more complex shapes.
The last step is coloring your new beads. Thread them on a temporary string, fishing line works well. In a small container thin some acrylic craft paint with water and dip the beads into this mixture, the wood will absorb the paint. After you remove the beads, wipe away any excess paint with a soft cloth then allow them to dry completely and seal them with the acrylic sealant spray. Staining will bring out the grain in the wood and the acrylic sealant will prevent the color from coming off the beads. Remove the temporary string and your new wooden beads are ready to use.
Happy Bead Making!


